Hexo+Github搭建blog笔记(踩过的坑)
Hexo
部署参考:
[使用Hexo + GitHub Pages搭建个人博客详解][0]
[0]: https://www.crazypudding.com/2016/10/01/Building-my-blog-by-Hexo-and-GitHubPages/ “使用Hexo + GitHub Pages搭建个人博客详解”
[1]: https://juejin.im/post/5c2e22fcf265da615d72c596 “submodule”
大坑1:github pages(即默认的blog)只支持master分支
默认是这么说的:

真的是大坑啊!!然而github pages默认只能是master分支的(可能是因为个人用户的关系??)
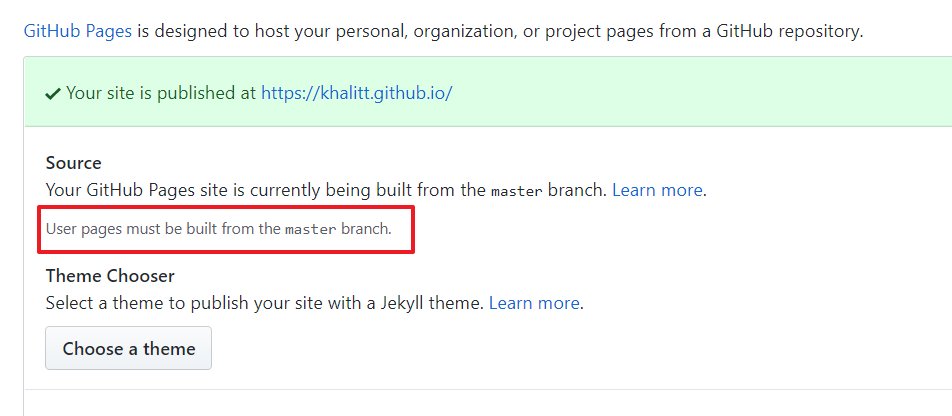
正确做法
把_config.yaml中的deploy部分的branch改成master。
新建一个branch,然后本地add remote到那个branch,用来备份所有文件(包括主题什么的)。具体而言,就是:
- 如果远程没有branch:(默认remote叫origin 分支名叫publish)
git push --set-upstream origin publish git add . git commit -am 'test' git push - 如果已经有branch了(为空)
git branch –-set-upstream-to origin/publish
git add .
git push
- 如果远程没有branch:(默认remote叫origin 分支名叫publish)
大坑2:theme是作为git submodule还是普通的folder好?
现阶段暂时是作为git submodule,不知道同步会不会出问题。
暂无问题。
参考:
[在 hexo 中使用 git submodules 管理主题][1]
hexo常用命令
参考:
简写
hexo n "我的博客" == hexo new "我的博客" #新建文章hexo p == hexo publishhexo g == hexo generate#生成hexo s == hexo server #启动服务预览hexo d == hexo deploy#部署
写作
Hexo 有三种默认布局:post、page 和 draft。
第一个是用的最多的,直接hexo new即可。
第二个就是新建一个网页的页面,对应的会生成一个对应名字的文件夹。如hexo new page test会生成一个/source/test文件夹,而且其中包含一个index.md。
第三个:这种布局在建立时会被保存到 source/_drafts 文件夹,您可通过 publish 命令将草稿移动到 source/_posts 文件夹,该命令的使用方式与 new 十分类似,您也可在命令中指定 layout 来指定布局。
hexo publish [layout] <title>草稿默认不会显示在页面中,您可在执行时加上 --draft 参数,或是把 render_drafts 参数设为 true 来预览草稿。
还可以用模板(scaffold)
latex公式支持
参考:
总体就是替换render 从marked为kramed,以及取出math 替换为 mathjax
对于含有shell脚本的markdown文件
由于{ } #这三个符号都是markdown的保留字,因此每次出现这些符号的时候,要不放到代码块中,要不然直接输入对应的HTML字符
! ! — 惊叹号 Exclamation mark " " " — 双引号 Quotation mark # # — 数字标志 Number sign $ $ — 美元标志 Dollar sign % % — 百分号 Percent sign & & & — 与符号(&) Ampersand ' ' — 单引号 Apostrophe ( ( — 小括号左边部分 Left parenthesis ) ) — 小括号右边部分 Right parenthesis * * — 星号 Asterisk + + — 加号 Plus sign < < < 小于号 Less than = = — 等于符号 Equals sign - - − — 减号 > > > — 大于号 Greater than ? ? — 问号 Question mark @ @ — Commercial at [ [ — 中括号左边部分 Left square bracket \ \ — 反斜杠 Reverse solidus (backslash) ] ] — 中括号右边部分 Right square bracket { { — 大括号左边部分 Left curly brace | | — 竖线Vertical bar } } — 大括号右边部分 Right curly brace 空格
hexo插入图片
这一篇主要可以参考其中typora结合的方式 hexo与typora结合
详细的三种方式的介绍:Hexo中图片处理正确姿势
这篇也很详细 在Hexo博客中插入图片的各种方式
注意
- 安装hexo asset image时候要指定github,才能安装到最新的版本(否则结尾有io)
npm install https://github.com/xcodebuild/hexo-asset-image --save删除带图片资源的文章
直接加多一个*wildcard即可,就能把文章和资源文件夹一起删除了
# rm -rf source/_post/tilte*.md
rm -rf source/_post/pyspark-basics*
20210107 update
最佳姿势:typora + hexo-asset-image组合使用(hexo-asset-image需要按照上面的参考链接安装并配置好)
参考scaffold/article-img模版,注意配置typora-root-url和typora-copy-images-to
title: {{ title }}
date: {{ date }}
tags:
categories:
typora-root-url: {{ title }}
typora-copy-images-to: {{ title }}
hexo deploy时不断弹出github登陆窗口
参考 fatal: could not read Username for ‘https://github.com': Invalid argument
像下面这种情况:
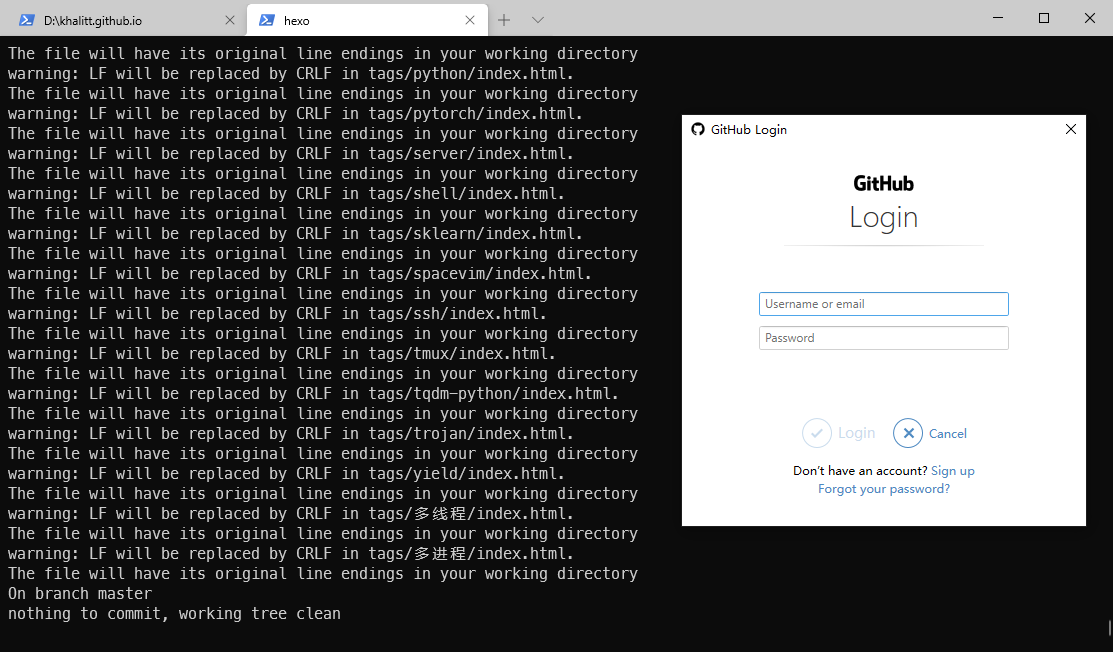
- 首先检查是否争取配置了SSH
ssh -T git@github.com - 没问题的话,如果依然出现上述问题,则按照上面的参考链接,从https方式换成SSH方式,可能话再把github token也加上
deploy:
  type: git
  repo: git@github.com:khalitt/khalitt.github.io.git
  branch: master
  token:
message: 在_post中设立次级目录
参考 Hexo - how can you set page path?
通过设置-p参数即可,注意要带上title,否则会用默认的post格式,然后把原本layout的参数作为title
# Correct
hexo new article-img ipython-hanging -p problems-record/ipython-hanging

# Wrong, without explicit title article-img will be regared as title with default layout
hexo new article-img -p problems-record/ipython-hanging
更换butterfly 主题(或者其他主题)后始终渲染错误
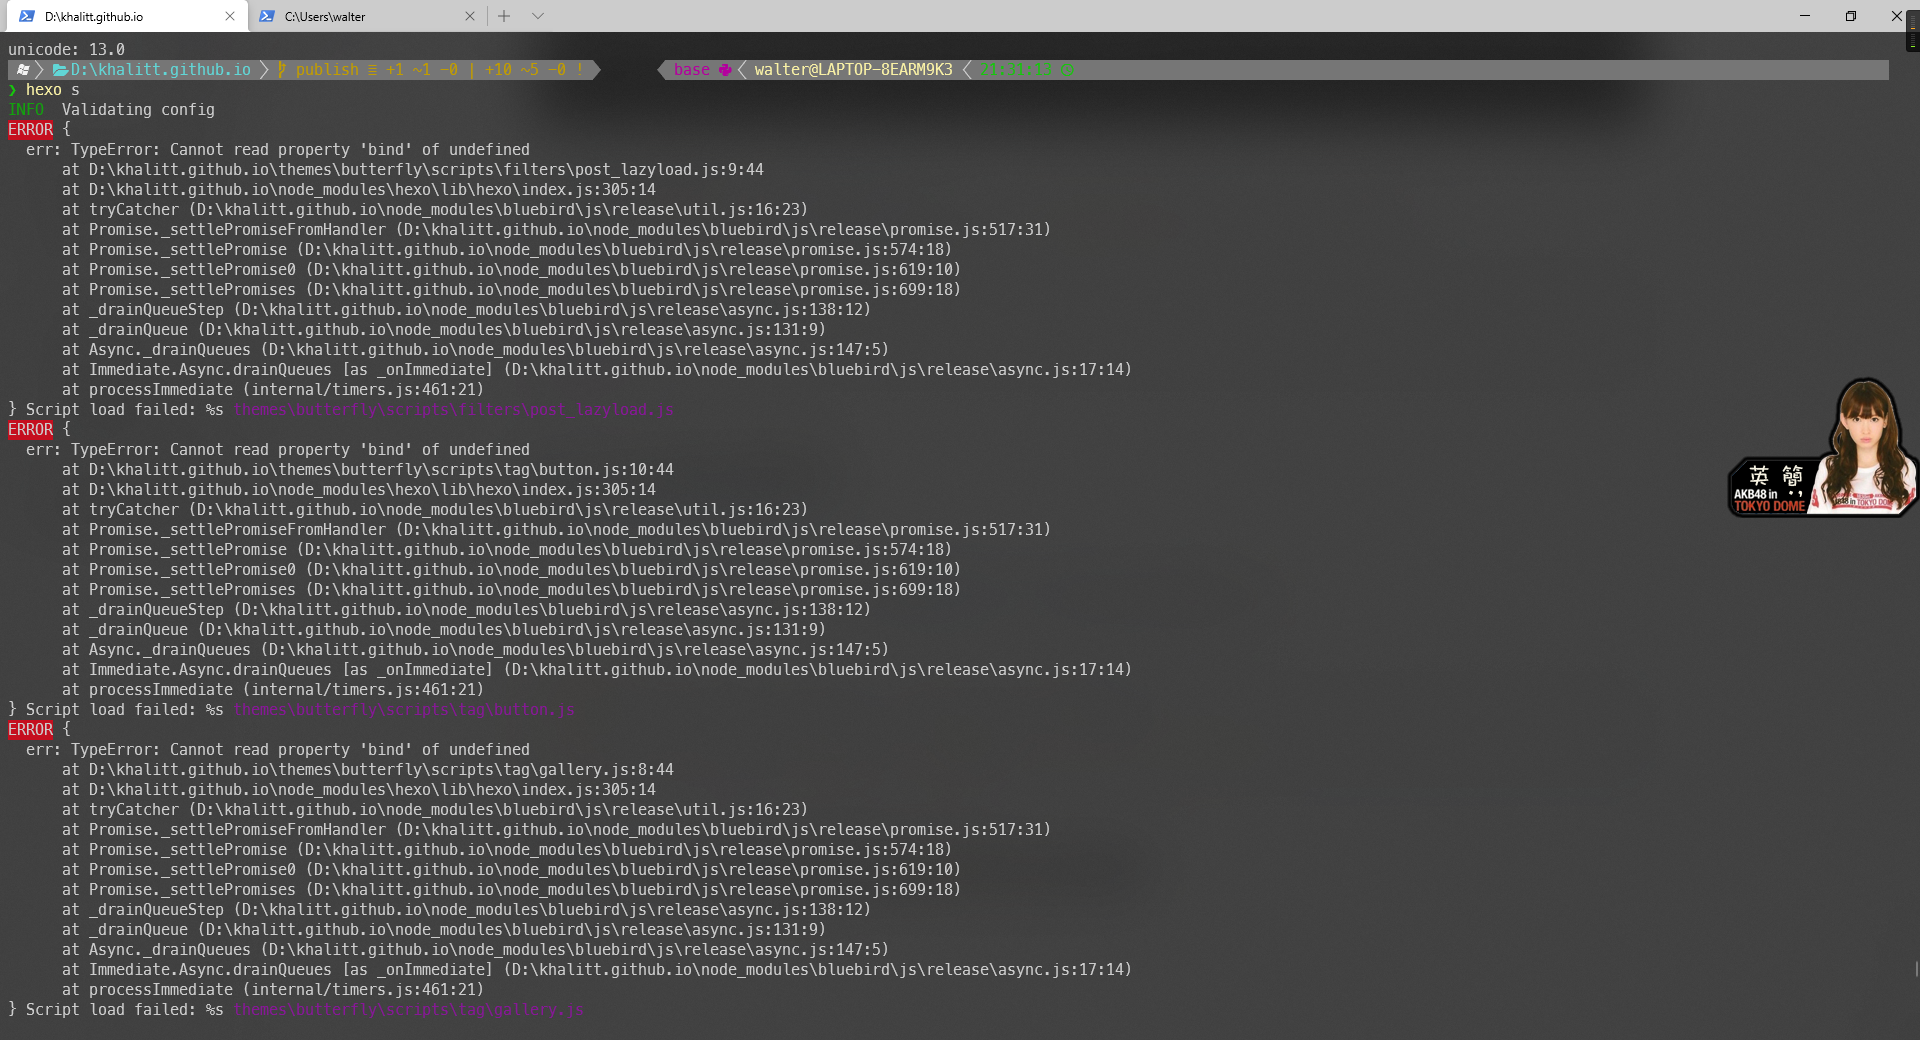
尝试在本地开启服务,则无法开启,报错:

参考 大佬能看下这是啥错吗?hexo版本5.1.1,hexo-cli版本4.2.0
删除的方法如下:
npm install rimraf -g
rimraf node_modules
重装即可
npm i